These are the instructions to install the IFace interface inside of the Yaesu FT-857D. The installation is very easy.
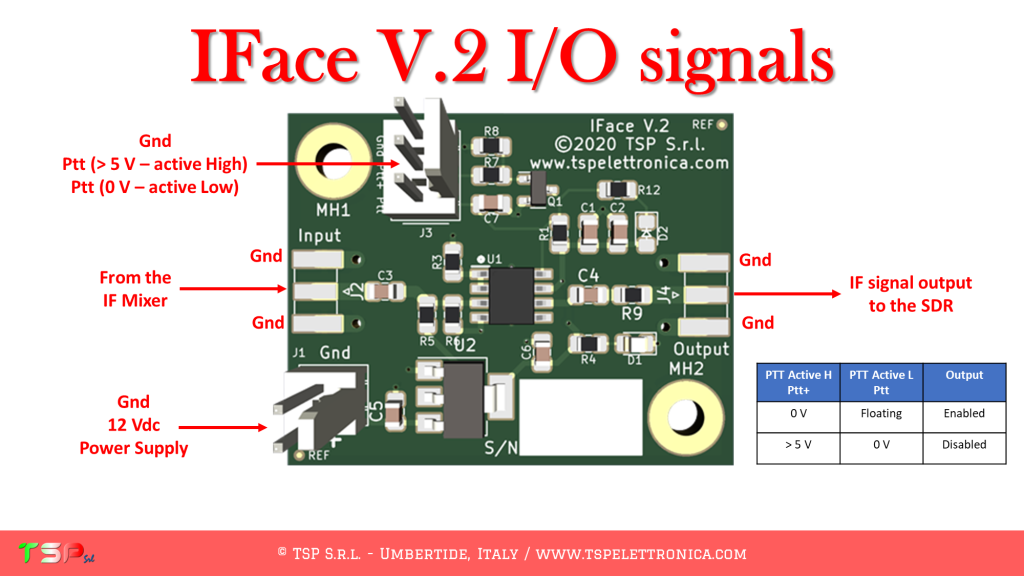
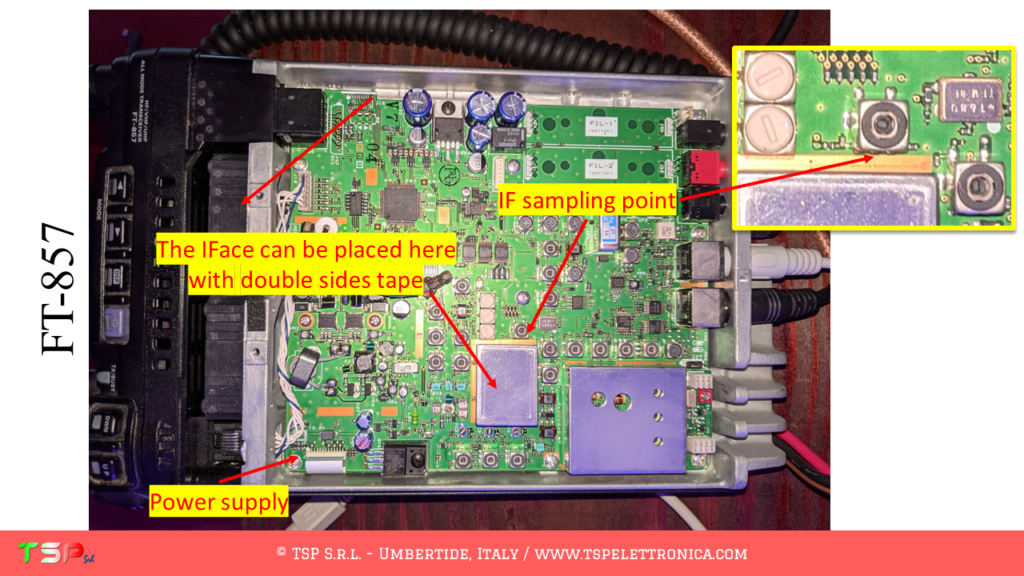
The FT-857D, as well as other radios, has a fairly complex configuration and uses different intermediate frequencies. We are interested in the first, the “wide band” one, the first one of the main band pass filter (the roofing filter so to speak). The one described here is therefore the sequence of operations to be performed to obtain a bandwidth sufficient to make a panoramic receiver around the selected IF frequency. The following image shows the point where the IF signal will be taken.
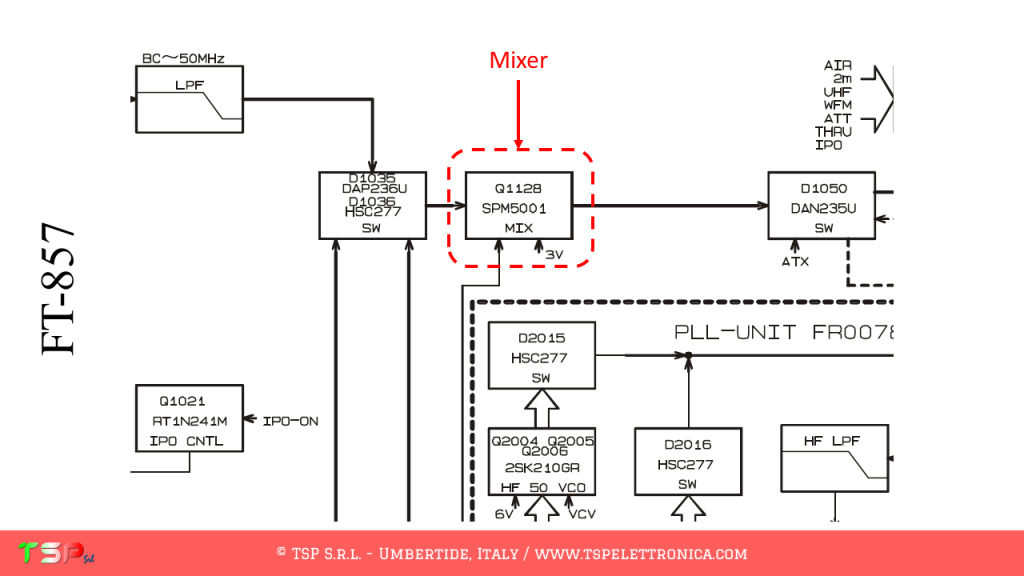
The PTT control is not required because different paths are used for the TX and the RX signals.
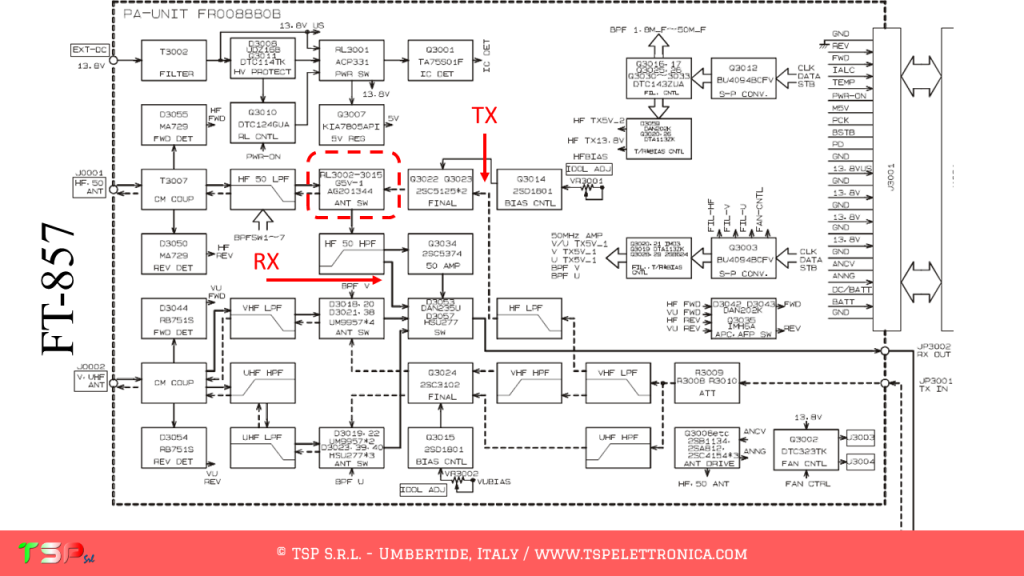
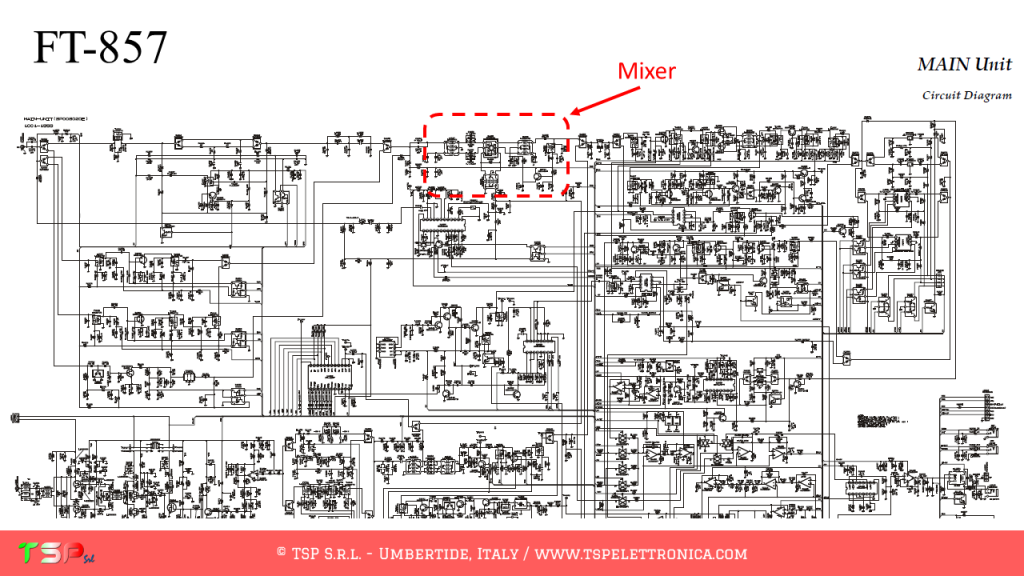
Let’s start by analyzing the wiring diagram. We have to find the first mixer and where to take the power supply. From the following images everything will appear clear.
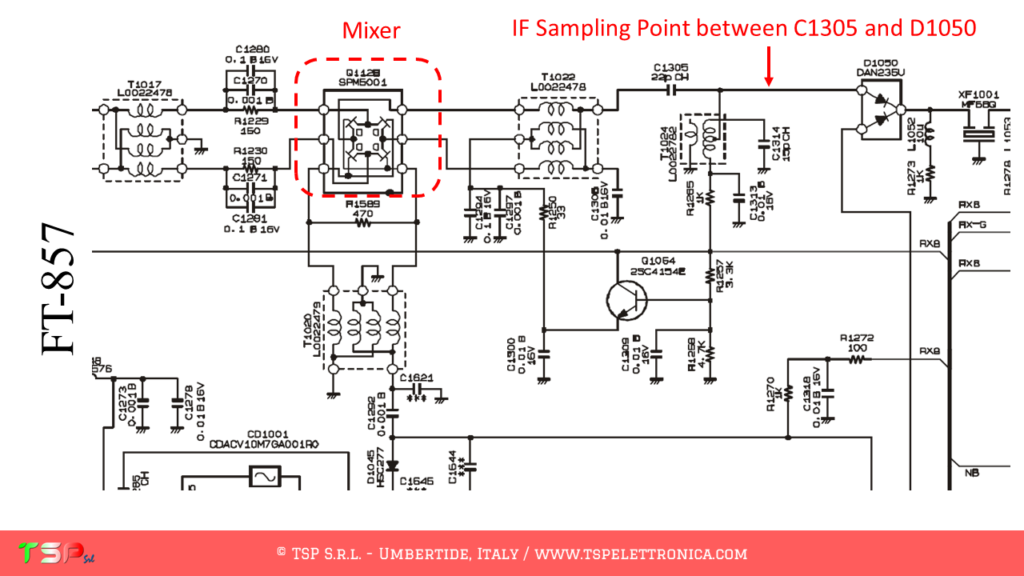
At this point we have to locate the points where we connect the electric cables to the IFace. The following images show where to take the various signals.
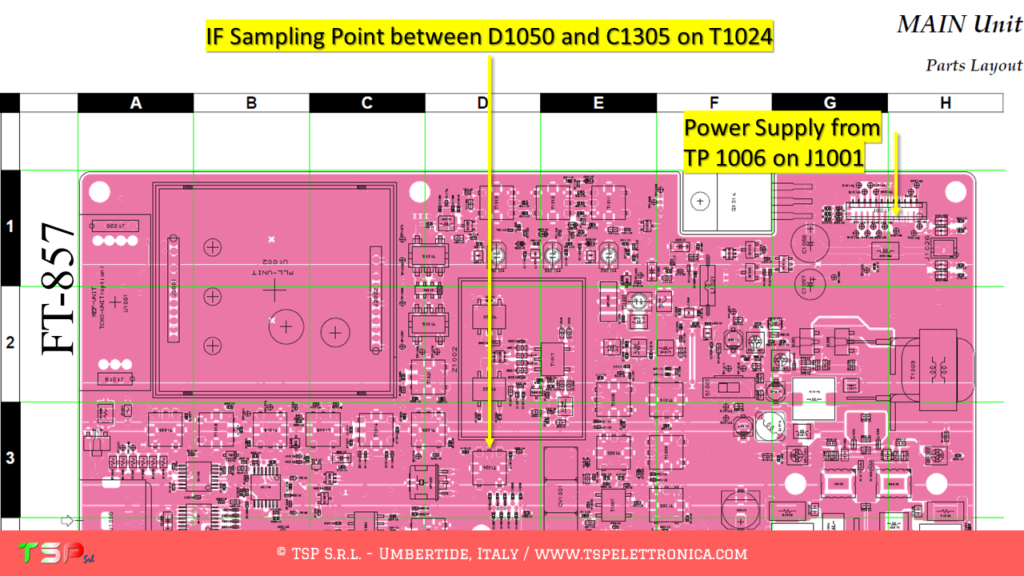
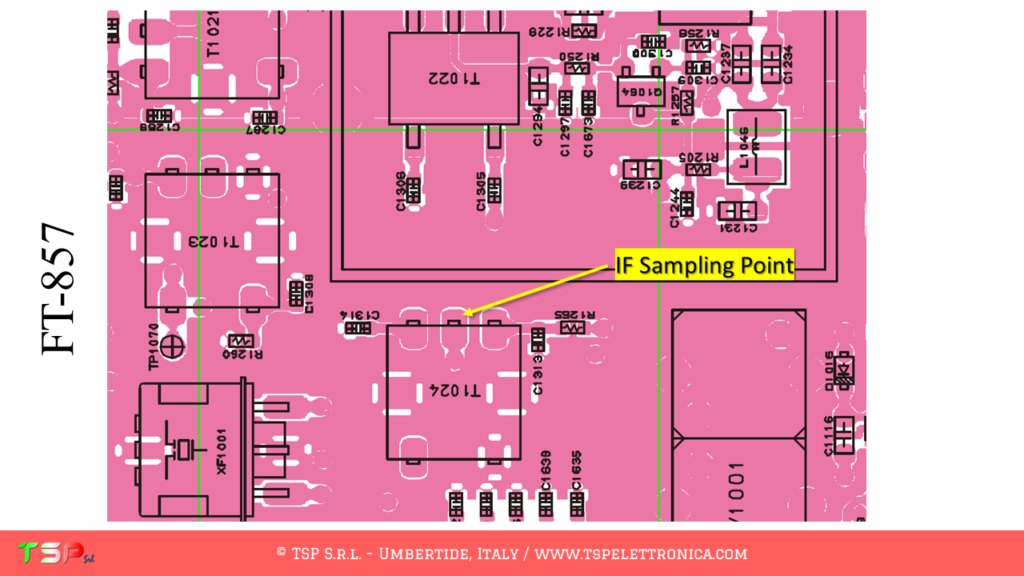
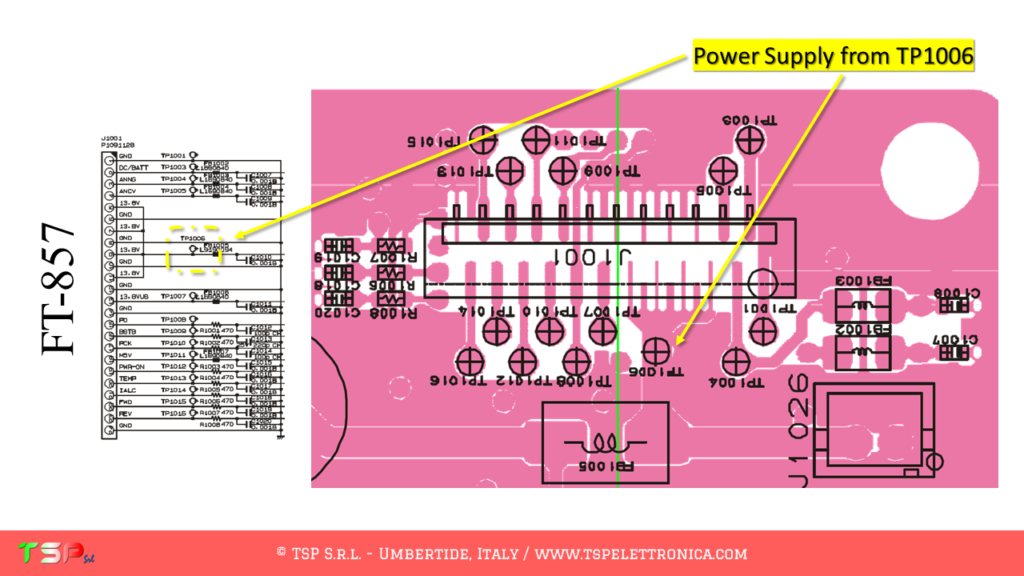
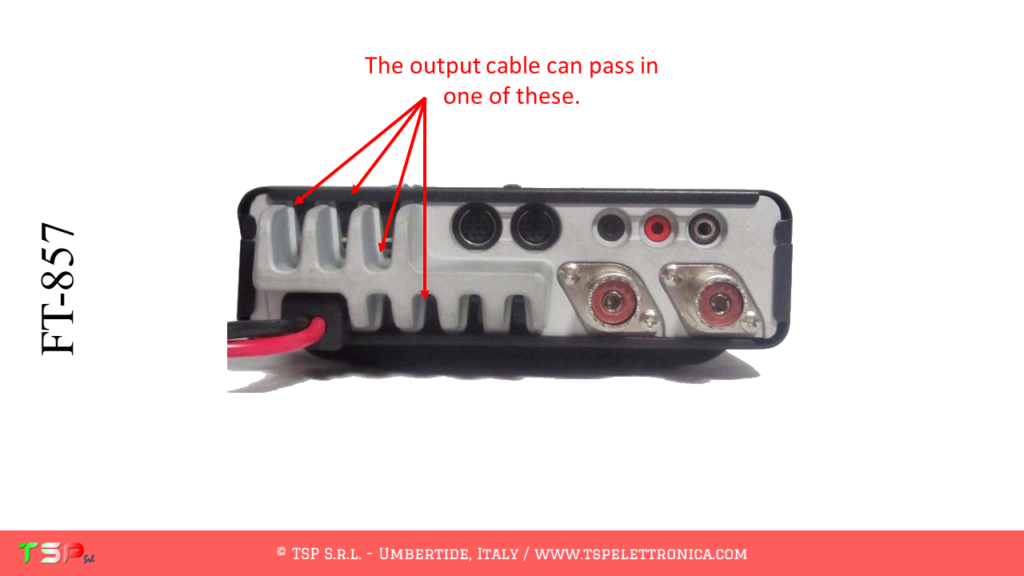
The output signal cable can simply through one of the ventilation holes as depicted here below.

ATTENTION: Though installing the IFace is not difficult, you
do this at your own risk. TSP S.r.l. is not responsible for any damage,
unwanted side-effects or whatever.
For more information do not hesitate to write us.
Have fun!
Leave a Reply